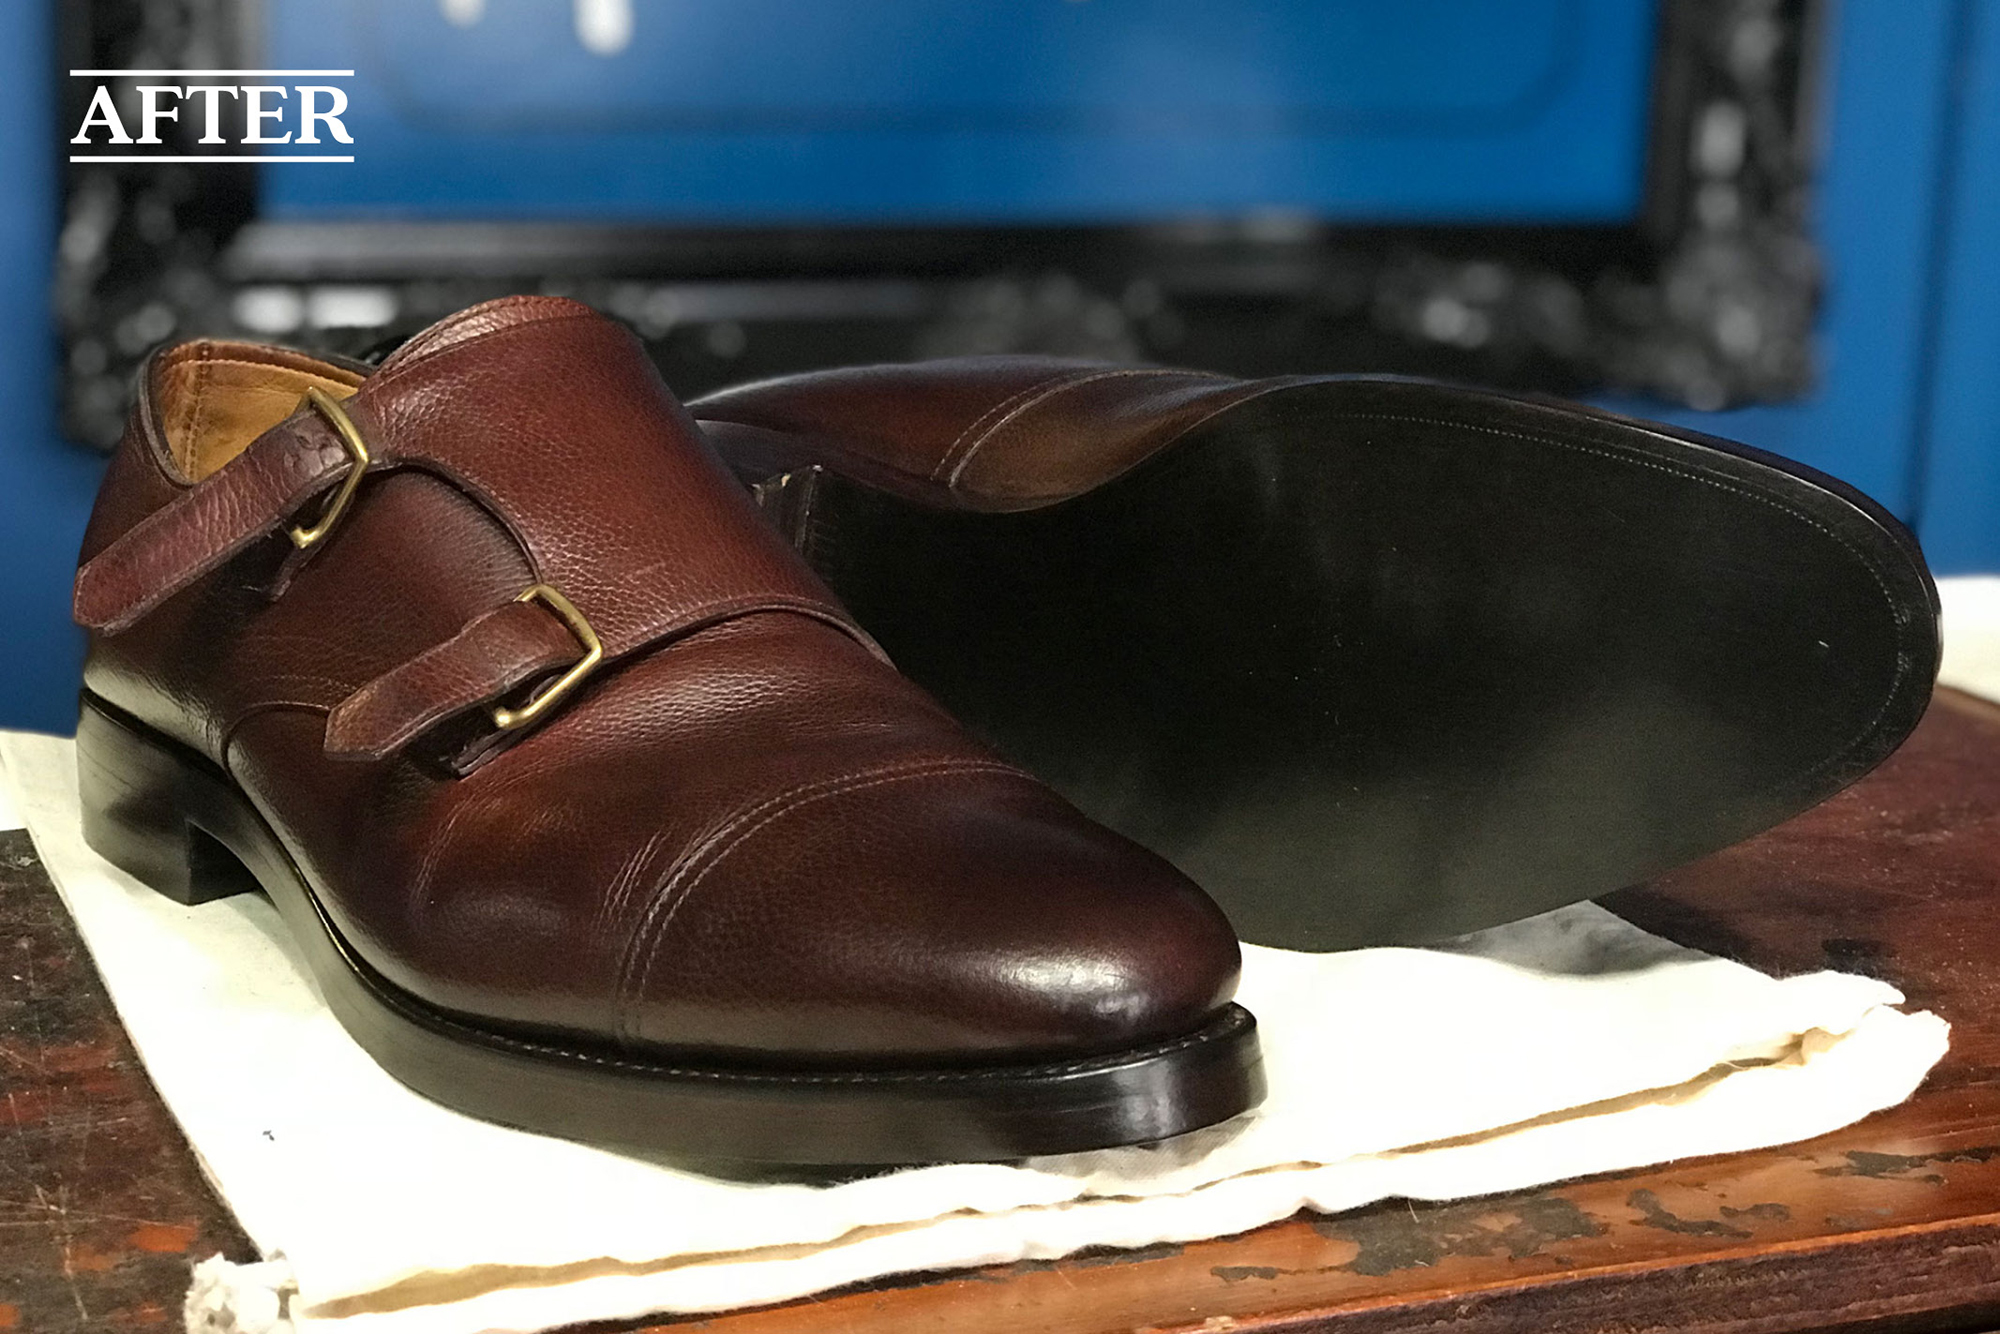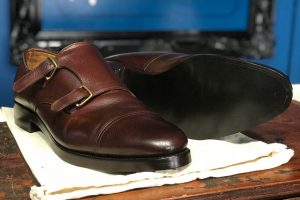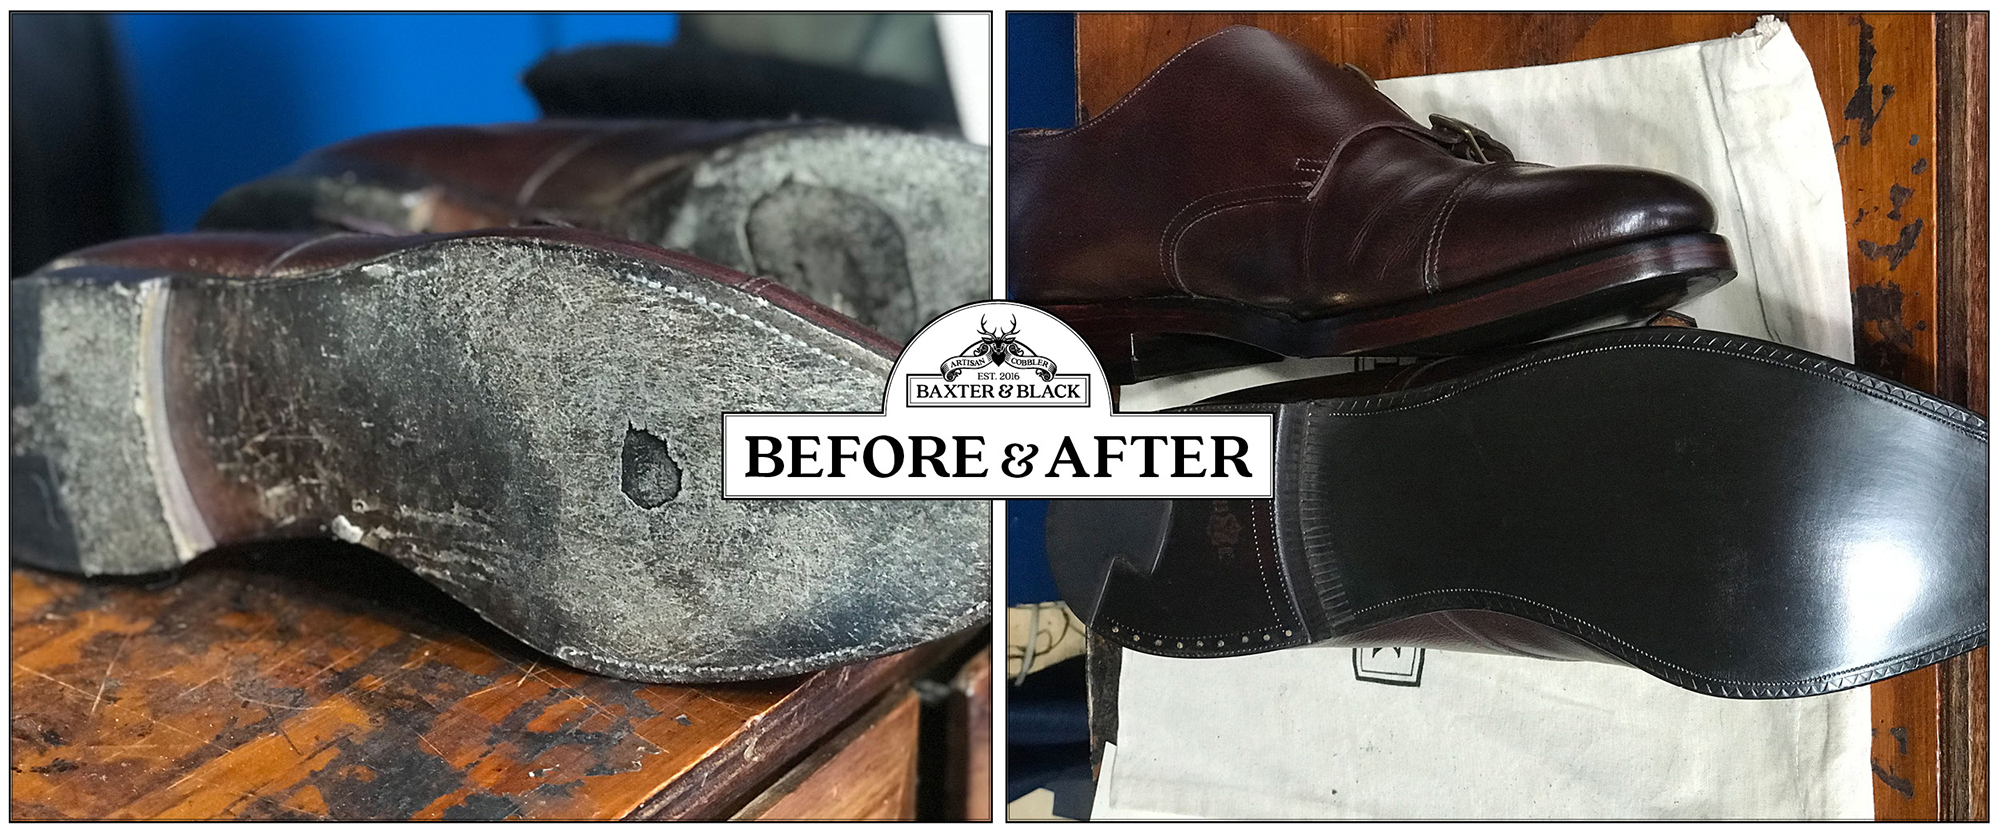
John Lobb with J&FJ Baker sole
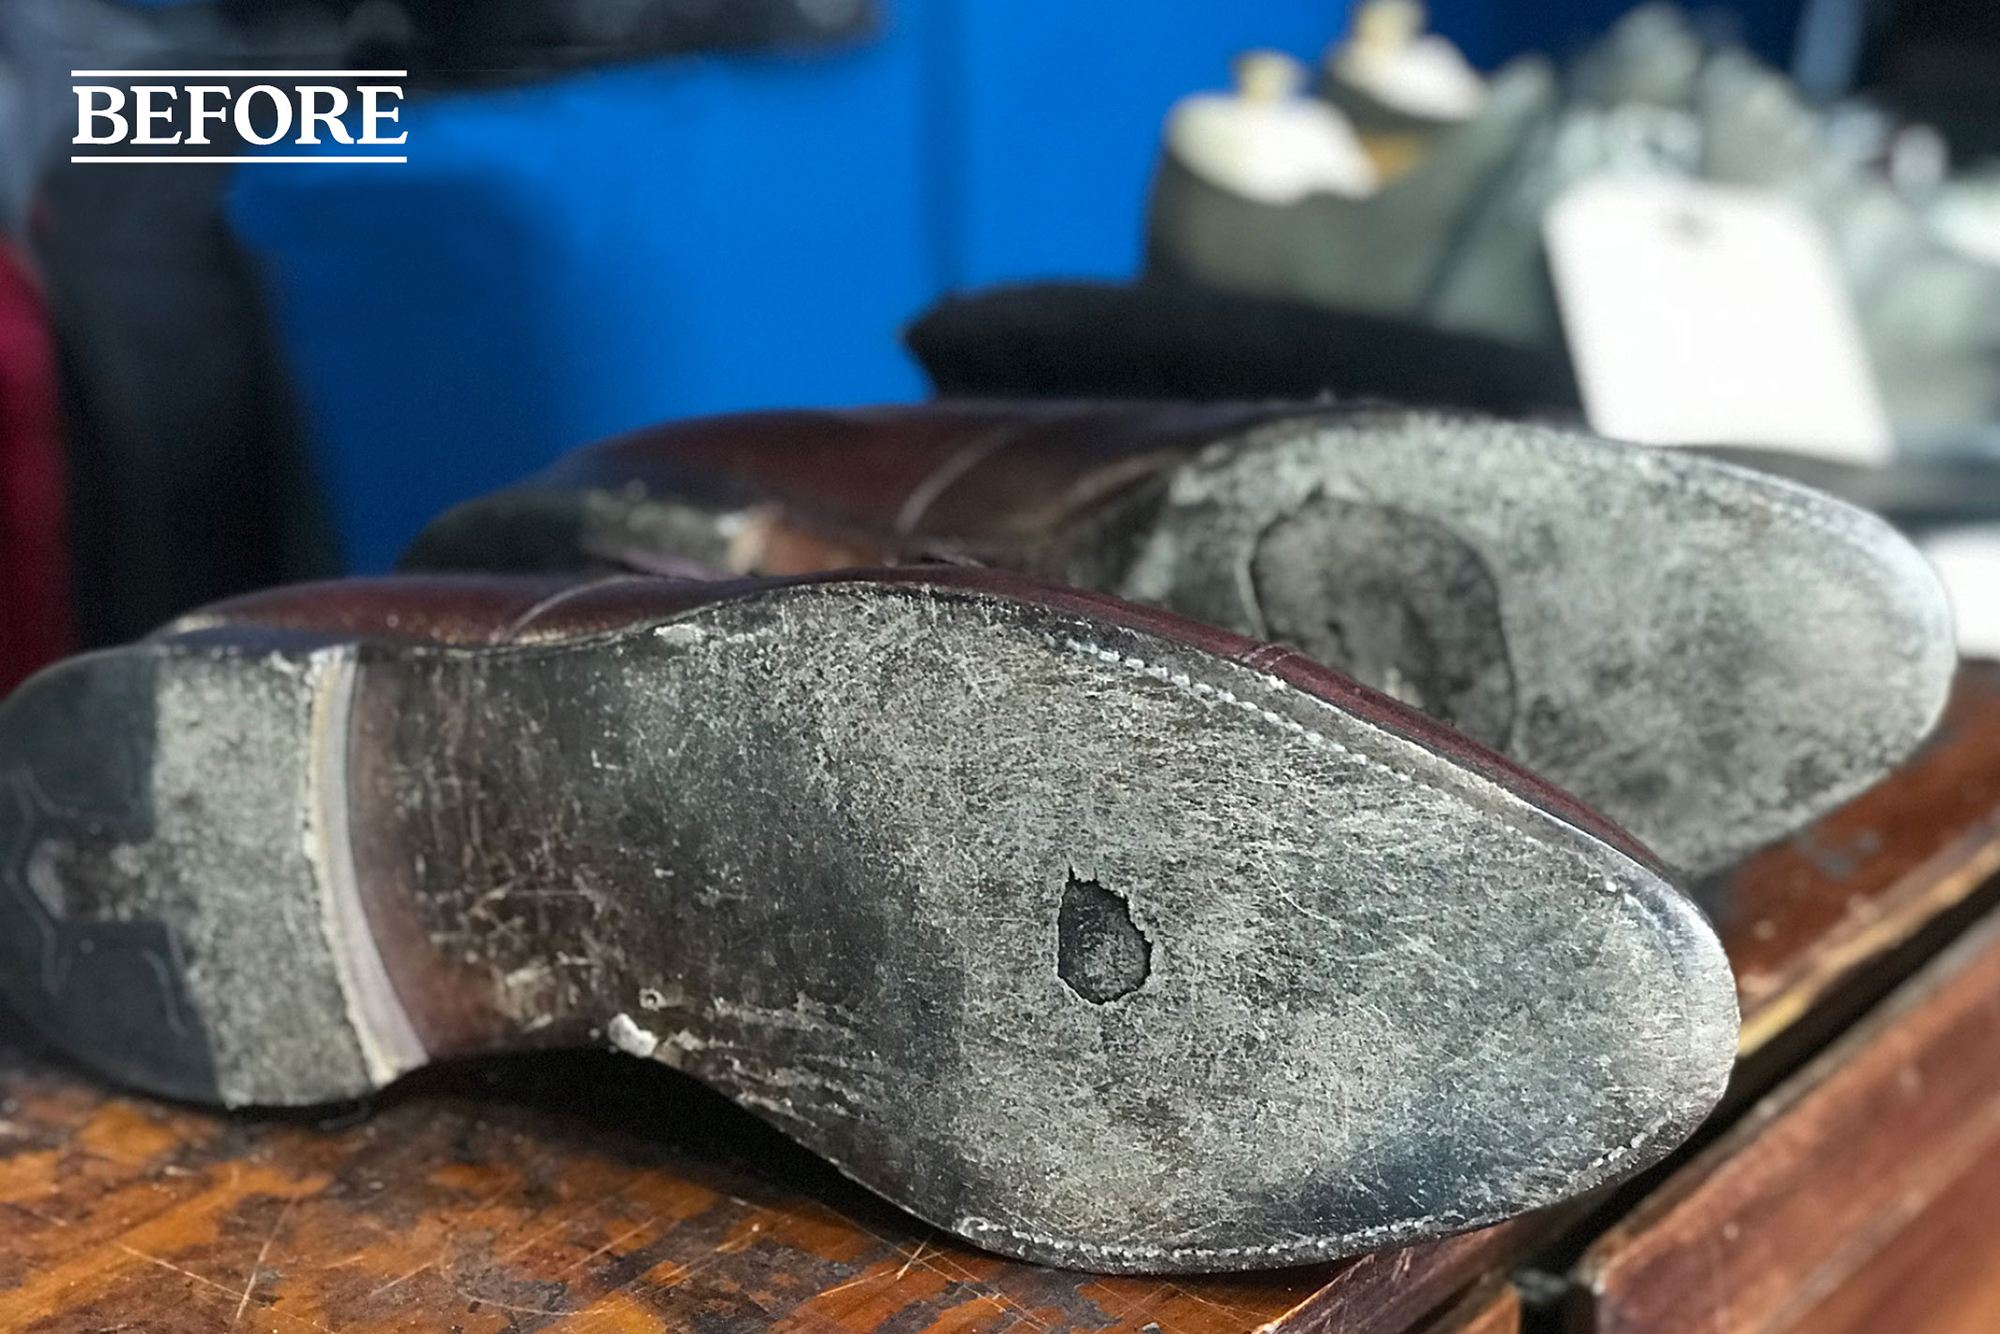
A pair of John Lobb double monks, with a double leather sole, should last a lifetime. But here we were looking at how our client had worn through two layers of leather on the sole. After consulting with our client, we chose our premium grade J&FJ Baker sole. J&FJ Baker leather is produced in the last traditional tannery in the UK. Oak bark tanned for twelve months, this means the leather is extremely durable. Consequently, it is able to withstand quite a beating.
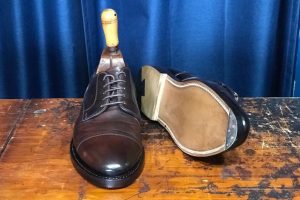
Because they were a formal dress shoe, we chose to keep them blind welt stitched. Additionally, we simulated the original colouring of the sole. As they were a double leather sole, we used a softer middle layer that would add comfort and flexibility. At just under 2cm thick of leather soling, very few establishments can welt stitch at that thickness. But thanks to our long term procurement of top-class machinery, we were able to stitch neatly through all the layers. To finish, we added an adornment of brass nails, supplied by Blackbird Nails in Slovenia.
Our Process
- Knowing that we were undertaking an extensive full sole, we first went about taking off the heel block. We then took off both layers of the J&FJ Baker sole.
- With the old cork exposed, we could easily scoop it out and then set about unpicking the old welt stitches from the welt.
- With the stitches unpicked we fitted new spreadable cork into the shoe and set it aside for it to dry.
- Roughing the middle sole we then applied two layers of glue and set aside.
- With the cork dry, we applied two layers of glue to the bottom of the sole.
- Having allowed both to adequately dry, we then heat activated the surfaces and bound them together and set them aside to cure.
- We roughly scoured the surface of the leather Baker sole and applied two layers of glue to the surface and set aside to dry.
- With the bonded surface between the shoe and midsole having had time to cure we then roughed the outer surface of the midsole. Furthermore, we applied two layers of glue.
- We left enough time for both surfaces to cure. After this, we then heated them and bonded them together.
- With the midsole and Baker leather outsole bonded together, we set the shoe aside and let sit.
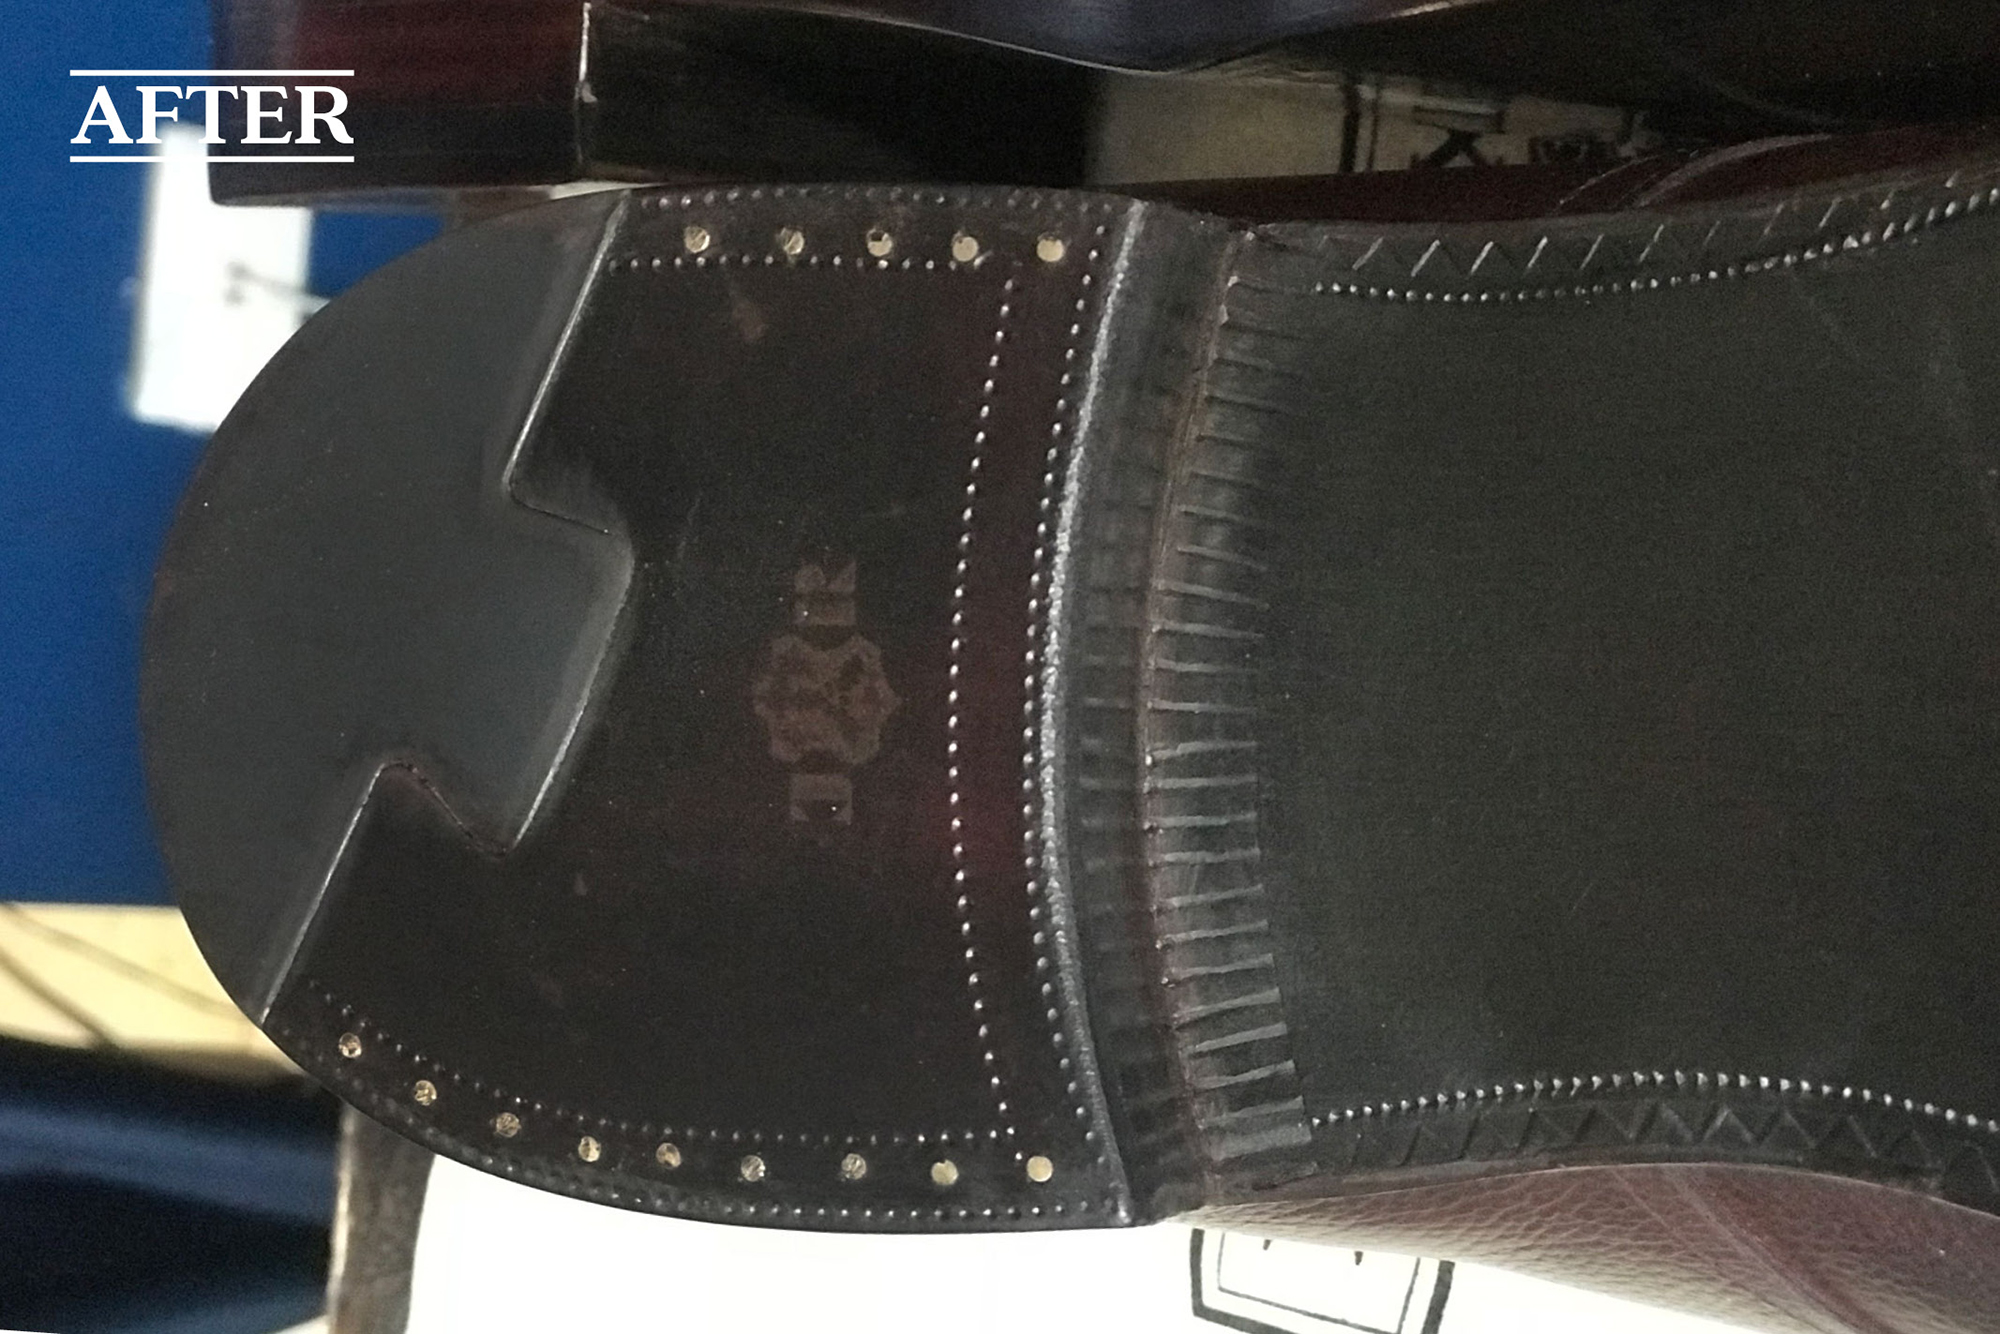
- Using the original heel block as a template, we cut the required heel block layers out of leather. We then selected the JR dovetail rubber/leather dress heels.
- We roughed all the heel layer sides and the underside of the JR Dovetail dress heel and applied our initial layers of glue and set them aside.
- With the Baker leather outsole and the midsole having cured, we then trimmed the edges to the welt edge.
- We then mellowed the Baker leather outsole with water and found the corium line.
- With our knife, we cut a horizontal line in line with the corium line. It was a depth of 1cm from the sole edge.
- Using our lip folder tool we pushed up the newly cut lip and revealed the freshly exposed leather.
- We used our sole groover to mark the groove line that we were going to machine welt stitch into.
- After adjusting our welt stitcher to the correct stitches per inch (SPI), we stitched to the depth so we would stitch into the groove.
- We wet the stitched area and the flap of leather. Next, we used our specific starch paste to cover the area, we then folded the flap down to cover the stitching.
- Using a sleeking bone we smoothed the flap area down. We did this by working from the middle of the sole and pushing towards the edge getting rid of any wrinkles in the leather.
- With the sole drying, we marked out the area where the heel block would sit and glued the first lift on. We then balanced the other lifts and heel top piece by sanding down the first life, if needed.
- With the first lift glued in place, we secured it further by nailing it to the leather sole.
- We then glued on the other lifts and heel top piece and set aside to dry.
- Once dry, we shaped the heel block and heel top piece.
- Nails were driven through the heel seta into the layers of the heel block securing the whole heel.
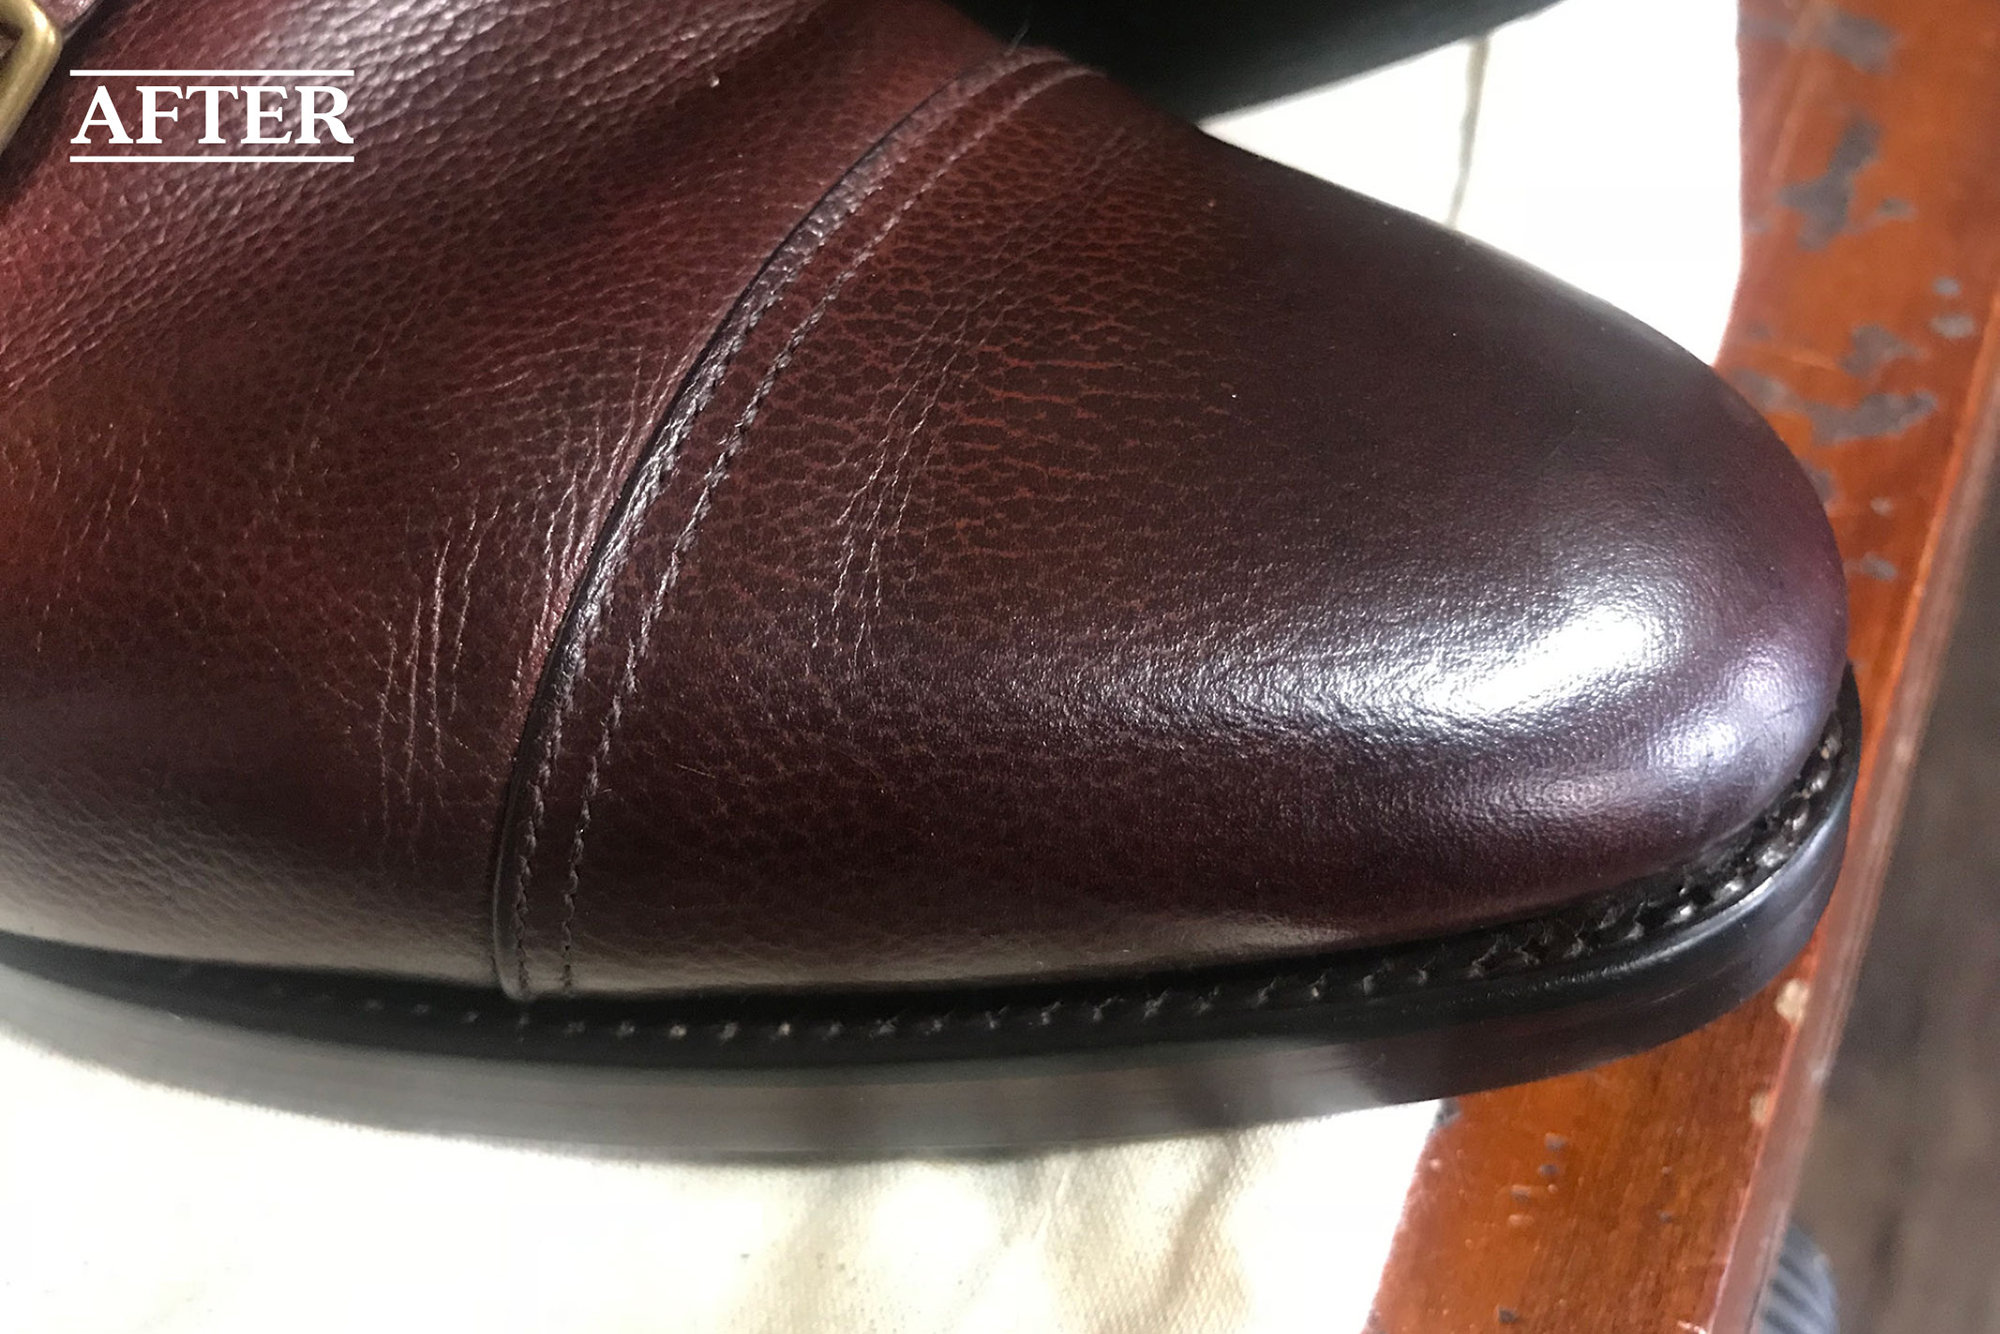
- The rest of the shoe was then polished with Saphir crème and waxes to a high shine.
- The bottom of the leather sole had hard wax applied to it. Using a sole iron we heated the wax and worked it into the leather. Finally, we polished it with Saphr waxes.